NGOT8R's 107ci (AKA: The Komodo Dragon) has been wounded

I usually just wipe the cylinder with oil on and never had an issue . I also run a break in oil for the first 500mi. then change to Amsoil or Klotz. looks like a clearance or cylinder out of spec to me . make sure your shop is using a Hone plate when boring and honing your jugs. I also will heat cycle in the shop, run a couple miles let it cool check plugs, run it 25mi cool , 100mi cool, 500mi oil change and burn her down. some say give it 1000mi break in before you get into her but I hadn't had any issues on any builds yet .

Yes, the machinist will bolt the cylinders to torque plates before performing his magic. What baffles me is how this was even an issue to begin with when cylinders were supposed to be bored to a specific size?
 
NGOT8R, its just my observation from the pics posted, and the indicated wear. This could be typical piston rock, some times typically seen when using forged pistons (assuming yours are forged) with larger clearances, due to the higher expansion rate over casted pistons. Forged pistons are great for medium and heavy duty engine applications, typically not needed for light or street (daily driver) application. Some forged pistons are machined with an elliptical (out of round) shape and may even have a slight taper to compensate for expansion and temperature differential between the top and bottom of the piston. Just my thoughts as you complete your build.
 
NGOT8R, its just my observation from the pics posted, and the indicated wear. This could be typical piston rock, some times typically seen when using forged pistons (assuming yours are forged) with larger clearances, due to the higher expansion rate over casted pistons. Forged pistons are great for medium and heavy duty engine applications, typically not needed for light or street (daily driver) application. Some forged pistons are machined with an elliptical (out of round) shape and may even have a slight taper to compensate for expansion and temperature differential between the top and bottom of the piston. Just my thoughts as you complete your build.

Thanks for the insight danoday. I'm new to all of this and certainly appreciate all of the help that I can get. I'm very curious to see what the HD cylinder specialist will find when he examines the damaged pistons and cylinders. I come from a drag racing background, so I do ride my Glide very hard a lot. In fact, the reason I built the 107 motor was because I felt like the stock motor was a slug to begin with.
 
Update: I took the cylinders to the machine shop today. The machinist measured the Pistons and cylinders and said that the rear cylinder was .001 too tight and the front was .002 too tight. The cylinders were then refinished and away I went. I spent the rest of this afternoon cleaning the cylinders over and over and over and over again in hot soapy water with Dawn dish soap, followed by several passes with a clean rag and brake and parts cleaner until they were super clean just as I did the last time. Next up, I will file and set the ring end gaps and then install the Pistons on the rods and into the cylinders.
 
Wow. I guess your doing your due diligence.

I'm trying my best to. I've spent a couple of days cleaning everything (throttle body, rod ends, pistons, lifters, rocker boxes, heads, oil pump, cam plate, cams and a few other things), in preparation for reassembly. I also cut out the back pressure plug in my Pro Pipe baffle to make it more free flowing. In addition, I sanded and painted the baffle because I was tired of looking at the surface rust which was visible in the muffler.
 
Update: I took the cylinders to the machine shop today. The machinist measured the Pistons and cylinders and said that the rear cylinder was .001 too tight and the front was .002 too tight. The cylinders were then refinished and away I went.

What is your piston fit clearance and ring end gap?
 
What is your piston fit clearance and ring end gap?

I don't remember what he said the piston fit clearance was, but I can tell you that I set the top ring end gap to .019 the first time around (a little on the loose side), which was fine, but this time around I set it at .018. I set the second ring end gap at .023 first time around and at .022 this time around.

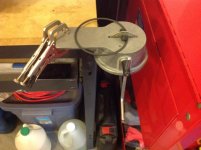
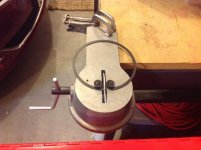
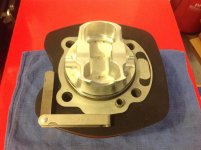
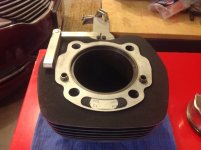
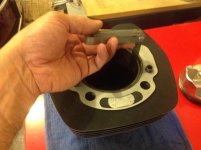
What a tedious task it is to set the ring eng gaps...grind, insert ring into cylinder, square up ring and check with feeler gauge. Repeat the process over and over and over and over again until you arrive at the appropriate gap. Now it's time for another cleanup of the cylinders and then bag them until I get the rings cleaned and installed on the Pistons, after which the Pistons will be installed onto the connecting rods. Here are a few pics of the steps taken during this process. I'm glad it's over too because it takes forever to do this. I had to move slow, so as to not overshoot the appropriate end gaps on both top and second rings for each cylinder.
 

Attachments

  • image.jpg
    image.jpg
    56 KB · Views: 0
  • image.jpg
    image.jpg
    55.1 KB · Views: 0
  • image.jpg
    image.jpg
    62.9 KB · Views: 0
  • image.jpg
    image.jpg
    56.8 KB · Views: 0
  • image.jpg
    image.jpg
    54.6 KB · Views: 0
Last edited:
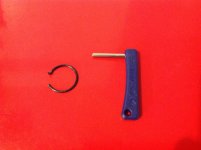
I finally got the Pistons onto the rods and the last two wrist pin clips installed. What a PITA it is to install these things (even with the supplied tool). I dreaded doing this the first time around and certainly wasn't looking forward to doing it again this time. Here's a tip: Install one clip on each piston on your work bench, that way you will only have to fight with the last two clips once the pistons are on the rods. It took me over an hour to get the last one on. For those of you who have been, or will go down this road, either know what I'm talking about, or will know when you attempt to do it. Here are a few pics including the last stubborn clip.
 

Attachments

  • image.jpg
    image.jpg
    83.3 KB · Views: 0
  • image.jpg
    image.jpg
    67.7 KB · Views: 0
  • image.jpg
    image.jpg
    49.7 KB · Views: 0
  • image.jpg
    image.jpg
    44 KB · Views: 0
  • image.jpg
    image.jpg
    40.9 KB · Views: 0
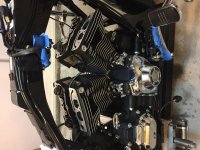
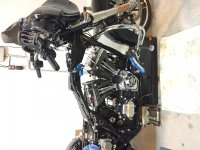
I spent the day performing surgery on Komodo. He's coming together slowly, but surely. One of the tedious jobs was running thread chasers through all 34 holes in the heads to remove any of the old Loctite, so that the bolts could be torqued down properly. I used a short cut, or easier method for adjusting the pushrods this time around, which consisted of installing the pushrods without the pushrod tubes in place, after which I removed the rocker arm assemblies and pushrods and then installed the tubes, pushrods and rocker arm assembly. I then had total access to the pushrods for adjustment, as opposed to the limited room I would have had using the Fuel Moto supplied pushrod tube holder. I still need to install the throttle body, air cleaner, tank and exhaust before adding oil, priming and pressing the start button. I'm going to try and get to that stuff tomorrow if nothing jumps in the way. Pic appeared sideways for some reason and I don't know how to rotate them. Will someone please rotate them for me? Thanks
 

Attachments

  • IMG_3010.jpg
    IMG_3010.jpg
    82.1 KB · Views: 0
  • IMG_3012.jpg
    IMG_3012.jpg
    70.5 KB · Views: 0
Last edited:
Will someone please rotate them for me? Thanks

b36ceb60c9a7576934b2a6597c2d4359.jpg

ec3a132d0aefd81d89cd9c6ed99c1fd5.jpg
 
this 3d has become my nightmare...

Inviato dal mio HUAWEI NXT-L29 utilizzando Tapatalk
 
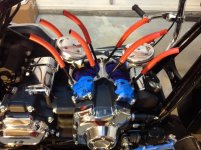
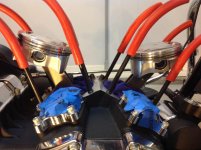
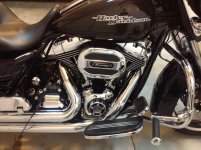
Guess who's back and angrier than ever? The new and improved AEM built 107: (A.KA. "KOMODO 2.0"). I finished the build yesterday and followed up with a series of heat cycles, beginning with 30 seconds and increasing the run time by 30 seconds for each cycle thereafter until I reached a total of 4 minutes. This took quite a while to do because I had to wait until the motor was completely cooled down between cycles. This morning my wife and I took it out on an 85 mile ride to seat the rings. We had a great time, although it was a little on the chilly side, but great weather for the motor. My brother brother and sister-in-law also rode with us on his 2017 CVO SG. The motor seems to be performing flawlessly and the hammering noise is gone (thank GOD)! I only spun it up to 3500 rpm during the ride, but it felt nice and strong. I also love the improved sound from the baffle mod that I did on the V&H Pro Pipe. Here's a motor pic after it was put back together and a short video clip with a couple of blips of the throttle.

https://youtu.be/7rSWvswgMwc
 

Attachments

  • image.jpg
    image.jpg
    83.2 KB · Views: 0
Update: I took the cylinders to the machine shop today. The machinist measured the Pistons and cylinders and said that the rear cylinder was .001 too tight and the front was .002 too tight. The cylinders were then refinished and away I went.

Nice work on the rebuild. Too much fun, I'll have to do mine this winter.

I was wondering (see quote): cylinders are bored while clamped in torque plates to get the size correct, I guess one would need to install torque plates to take cylinder bore measurements?
 
Nice work on the rebuild. Too much fun, I'll have to do mine this winter.

I was wondering (see quote): cylinders are bored while clamped in torque plates to get the size correct, I guess one would need to install torque plates to take cylinder bore measurements?

Thanks hulkss. That is correct, the cylinders are bolted to torque plates when measuring and boring them.


Latest posts

Forum statistics

Threads
8,034
Messages
69,478
Members
15,208
Latest member
matta317