Installed the HD Garage Door Opener kit on my 14 SGS today...

Did you connect the white wire to the headlight harness, the headlight adapter piece, or to the harness section those pieces hook to (does that make sense?)?
...

I actually hooked it to the daymaker pigtail harness ( I think ) it would have been much easier that way.... or maybe not....lol I CAN;T REMEMBER!!!! Sorry I didn't answer this earlier...flew right past it.. lol
 
Ok. It turns out that my install was correct, but the transmitter was inop. I contacted Surdyke, explained that the transmitter didn't seem to be working, and they had a new one out to me within a few days.
I installed the new one- and entertained myself (and my neighbors) by repeatedly opening and closing the garage door in celebration.
So- let's see if I can load some pictures of the process-
In the process, I installed a daymaker headlight.
My bad- I guess I didn't take a picture of the accessory harness- this picture are the two pieces for the daymaker harness. I spliced into the one on the right- into the Blue/white wire. More on that later.
image.jpg

Remove the seat, left saddlebag, and side cover. The electrical harness (extra piece required for installation) connects here.

image.jpg

Then, you route the harness up, through here.... and to here.
image.jpg
image.jpg

You can lift the tank, or snake the wires from the fairing to the seat.

I found it easier to remove the headlight before I removed the fairing. Remove the screw for the trim ring, and then three screws on the mounting ring. Pull the headlight housing toward you, and unplug both wires.
 

Attachments

  • image.jpg
    image.jpg
    54.4 KB · Views: 0
Last edited:
image.jpg

Retaining ring.

These are the stock wires. I removed these in order to install the daymaker.
View attachment 5293

Remove the headlight harness from the retaining clip in order to give yourself more room to work.
View attachment 5294

This is the retaining clip, the harness will slide out, you don't have to fight trying to pull the grey clip off of the tray.
View attachment 5295
 
Last edited:
Great details! Nice job and glad you got it worked out....

Sent from my Note4 using Tapatalk
 
Place the transmitter on top of the amp tray, or in the mounting clip on the amp, if you have one. The circuit side should be visible.

Clip the white transmitter wire about 10 inches from the transmitter. You need to splice the white transmitter into the blue/white headlight wire. In hindsight, I probably coul have spliced it in at the plug end. Instead, I snipped the blue/white wire a few inches from one end. Then, I paired the white transmitter wire with the headlight end of the blue/white wire on one end of the barrel tube and the bike end of the blue/white wire into the other end of the barrel.

Now, the black transmitter wire is rather short, but you need to run it under the tank to the seat. The kit comes with an extra length of black wire. Use a red barrel to connect the black extension to the transmitter ground (black wire).
Tape the dangling end of the black ground to the rest of the white wire (that is mysteriously long enough to run to the tank) and pull the black ground through the plastic protective housing.... Or use whatever method you prefer to pull the ground extension through to the seat.... You don't need the extra 3 feet of white wire-
 
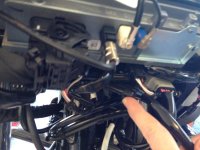
Now, everything left involves the simple connections with the awesome connectors Harley provided. Holy $&?! Those things are frustrating.
Any way, strip your wire ends about a 1/4 inch, insert into barrel, crimp down- hard. Insert the other wire into the other end and crimp- make sure you don't pull the opposite end out in the process. Lightly tug on the wires to ensure you have a good connection. Apply heat to shrink the sleeves.
Like Spazz said-
black to black transmitter to extension, and black to black extension to electrical accessory harness under seat.
Orange goes from transmitter in the fairing, under the tank, to the electrical accessory harness under the seat.
White wire goes from the transmitter to the blue/white of the headlight.
Double check all connections.
Replace the fuse.
Turn on ignition- don't start the bike.
Turn on your high beams- you should see a red light appear on the transmitter- the light is on a part that looks like a tiny red fuse.
If you see the red light blink. You have the connections correct.

Slide the headlight harness back into its retaining clip.
image.jpg

Reconnect the headlight to the headlight harness.

Reinstall the outer fairing- I'm a pro at the fairing removal now. Wow. I'm so glad I have a working GDO and sexy daymaker now.

Now I need to update my signature block.
Cheers.
 
Last edited:
My friend and I have been working on his daymaker the whole weekend trying to figure out why the garage door opener wont work when the harness is plugged into new led bulb. pull the bulb and it works.

Help


Latest posts

Forum statistics

Threads
7,973
Messages
69,217
Members
15,062
Latest member
Triggerman1067