120 to 114 to 113 Twin Cam Engine Rebuild

hulkss

Administrator
Sep 29, 2013
622
2
18
I started the rebuild of my 120ST. I want to to make it super reliable for a ride to Alaska this summer. Something about it did not sound right to me. Kind of like piston slap.

I'm going to completely disassemble it and rebuild. I'll keep posting as I go along. I only work on it a few evenings a week. I'll explain anything that is not clear in the factory service manual. Here goes......

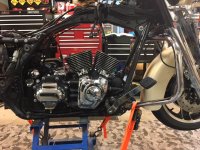
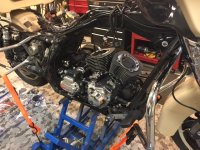
First, off with the bags & side covers, seat, gas tank, and exhaust. The hardest part was getting the mufflers off. Slip-on maybe but not slip-off. I'll use a little high temp nickle anti-seize at the slip joint when they go back on.
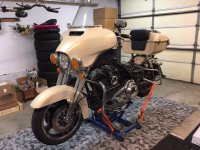
IMG_0907.jpeg

Next off with the air cleaner, rocker boxes, and throttle body.
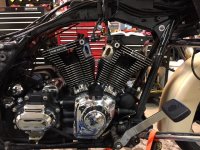
IMG_0909.jpeg

Take the throttle body off last, it's easier then to get a wrench on the bolts. The factory special intake manifold wrench p/n 94063-09 sux. Use a ground off hex wrench and a cheater bar. The lower rocker box wrench is good, p/n 94074-09. I did not need the H-D rocker cover bolt wrench p/n 94057-09 because I have custom 12 point fasteners on the covers. You don't need the special wrenches if you take the engine out of the frame first. I'll take it out in pieces and put it back without the cylinders & heads.
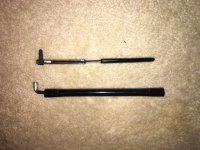
IMG_0941.jpeg
 
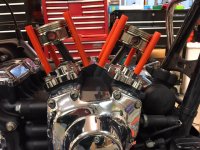
Off with it's heads.
IMG_0938.jpeg

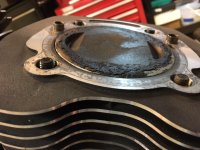
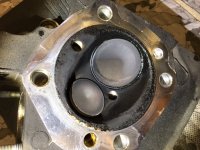
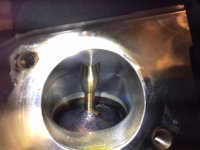
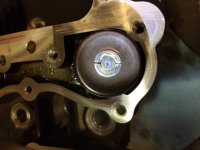
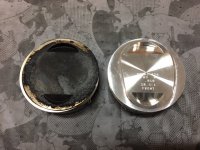
Uh-oh, here's the trouble....carbon on the piston and head in the squish gap thick enough to hit when the piston is at top-dead-center. The intake valve stem seals are leaking too much oil.

IMG_0915.jpegIMG_0922.jpegIMG_0928.jpeg

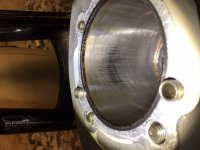
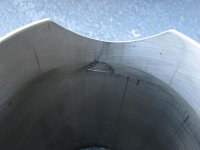
Some scuffing in the front cylinder too. Not real bad but not good either.

IMG_0917.jpeg

This engine has about 9000 miles on it. I used Amsoil 20W50 until the dealer filled it with H-D non-synthetic (about 1500 miles ago) and said that would quiet it down. I never saw any smoke and the engine was not burning an excessive amount of oil.
 
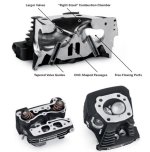
Ok...So I need to have the heads rebuilt. I do not have the tools or skills to do that, so I'm shipping them to: HD Street Performance

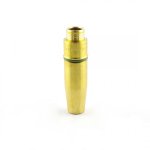
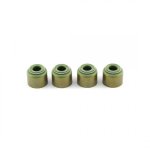
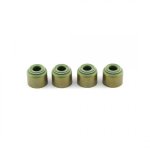
They will "blueprint" the heads with a precision valve job, install new AV&V manganese bronze valve guides, CC the combustion chambers to 10.8:1 compression ratio, install new AV&V beehive valve springs, set spring preload pressure, and install new viton valve stem seals. They will use the OEM valves or replace them if needed. I do not need any porting for performance as these heads are CNC ported from the factory (SE MVA heads).

The H-D valve seals and iron valve guides in the 120ST can be trouble as I experienced. The AV&V valve guides with viton seals have proven to work very well with long wear life and little oil leakage.

Valve stem seals provide a controlled leak of oil to allow the valve stem to be lubricated as it slides in the valve guide. The amount of oil that passes by the valve stem seal must be precisely controlled, as too little oil causes stem and guide wear. Too much oil causes carbon buildup as I experienced. The H-D stock iron guides need more oil and operating clearance than the AV&V bronze guides.

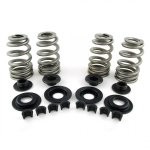
The AV&V beehive springs have less moving mass and operate at reduced spring pressure to improve valve train life. They have a harmonic resistant shape allowing better control of the valve train with a minimum of spring pressure. P/N VSK6000 will work fine with the SE 259E cams I am using.

Per AV&V on Manganese Bronze Guides:
This self-lubricating material allows a tighter valve-to-guide clearance. A tighter clearance results in the exhaust valve dissipating heat more rapidly and rocking less, which contributes to longer life. The valve stems will last longer, thanks to the slippery properties of manganese bronze. If a problem occurs and the valves bend, these guides will not crack and break apart like cast iron guides, which can destroy the engine. Customers report that engines with a tighter valve-to-guide clearance run more quietly.

Before shipping I will removed the compression releases and clean all the threaded holes with thread taps. They will be all ready to install when returned to me.
VSK6000-KIT.jpgVG5600S.jpgV312531-4.jpgheads.jpg
 
Due to the bore scoring I experienced, I need to have the cylinders bored and honed to fit new +.010 (4.070 bore) pistons. I'm sending the used cylinders and head gaskets to Dave Mackie Engineering: Dave Mackie Engineering

Per Dave Mackie: "Cylinder work at DME is done with state of the art air float boring, and automatic diamond honing equipment using current state of the art techniques. The cylinders, complete with gaskets, are torqued between specially designed torque plates to simulate engine operating conditions. This procedure allows the cylinders to take the set they will have when installed on the engine. They are given a multi-level cross hatch pattern that is best for the application and finished off with the latest plateau honing techniques as recommended by ring and piston manufacturers. Our plateau and soft brush honing techniques result in a shorter, cleaner break-in period, better ring seal, and longer engine life."

Cylinder finish and piston fit are critical to engine break-in, ring seal, performance, oil consumption, and engine life.

It is critical to have a plateau finish that is free of folded metal in the honing grooves. This is produced with a three step process:

1. Hone with rigid coarse grit stones to make deep grooves
2. Plateau the finish using fine stones to flatten the peaks
3. Remove folded metal that has become embedded in the crosshatch with an abrasive brush

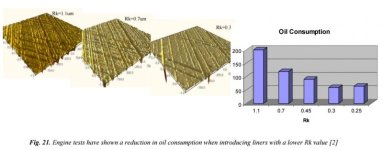
Here's a picture of a honed finish with the smoother plateau finish on the right and the benefit to ring seal and oil consumption:

finish.jpg

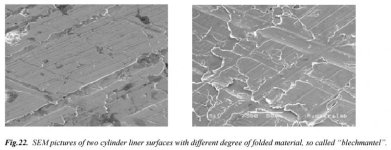
The remaining honing grooves in the plateau finish hold oil that is critical to lubrication. They need to be cleaned of folded metal that will break off during engine operation and form abrasive particles between the cylinder and piston.

Folded metal.jpg

These folded edges can be removed after plateau honing with an abrasive nylon flexible brush, sometimes called an ultra finish hone. It should be run briefly with honing oil in both directions of rotation.

An inspection tip from the guys at Goodson:

"Here is a slick little test that illustrates the effect of ultra-finish honing. After finishing a cylinder with conventional finishing techniques, dry the cylinder surface area. Take a cotton ball and lightly contact the cylinder rotating around 2 or 3 surface inches. Cotton strands can be seen hanging, snagged on the wall. Now use the ultra-finish hone on the cylinder with liberal amounts of honing oil. Repeat the cotton ball test after using the ultra-finish hone and see the difference. A very noticeable difference should occur with the number of cotton strands, almost no retention!"
 
Off with it's heads.
View attachment 11855

Uh-oh, here's the trouble....carbon on the piston and head in the squish gap thick enough to hit when the piston is at top-dead-center. The intake valve stem seals are leaking too much oil.

View attachment 11856View attachment 11857View attachment 11858

Some scuffing in the front cylinder too. Not real bad but not good either.

View attachment 11859

This engine has about 9000 miles on it. I used Amsoil 20W50 until the dealer filled it with H-D non-synthetic (about 1500 miles ago) and said that would quiet it down. I never saw any smoke and the engine was not burning an excessive amount of oil.

Thats looks all too familiar.....
 
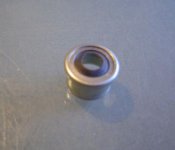
The CVO's get a newer spring energized viton valve seal p/n 18067-09.
seal09.jpg

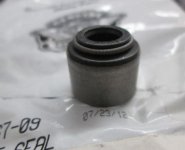
For some reason the 120ST's call for a cheap old seal 18046-98.
seal98.jpg

I can only assume they want more leakage to lubricate the valve stems for racing (same as 120R)? That's why I'm switching over to AV&V guides, seals, and springs. Staying with the H-D valves.

V312531-4.jpg
 
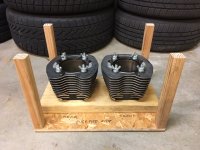
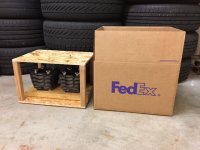
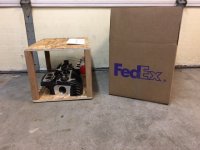
Got the Cylinders off and ready for shipment to be bored and honed to 4.0700 inches.
It was more work making the shipping crate than taking the bike apart.

no jugs.jpegcyl crate.jpegcyl box.jpeg
 
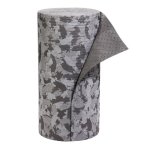
Awesome write-up! Looking forward to more updates. I like that camo floor.

The floor mat is: New Pig MAT116 Polypropylene Gray Ham-O Hamouflage Pattern Absorbent Mat Roll. Protects parts from the concrete and stops parts from rolling away. Oil drips and spills just disappear like magic. Toss it when it's trashed and put down a new piece.

51VnvWZvMfL.jpg
 
Now the heads are crated and going out for "blueprinting" with new guides, springs, and seals as described in post #6.

ship heads.jpeg
 
Shrinking the 120" to a 114"

Shrinking the 120" to a 114"

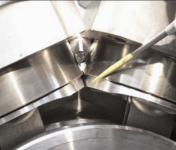
I do not like the piston and cylinder wear as I look inside the engine. Too many compromises and issues from the long stroke. The pistons need a big cut in the skirts so they don't hit each other at the bottom.

Gap.PNG

I'm going to drop back to 4.375" stroke. With a .010" overbore to 4.070" that will be 114 cubic inches. In fact, these are nearly identical dimensions as the new 114 kits for the 107 M8 engine.

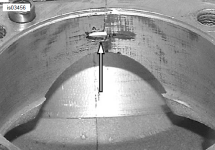
Could the cylinder bores be bigger for more displacement? Let's first look at the cases. Here's a photo of big bore H-D engine cases between the cylinders. The case bores are already as big as possible (4.262") to fit the cylinder spigots and fit a gasket. You can even see the bolt that holds the case halves together peeking through!! (that thin metal get's trimmed away)

center bolt.PNG

Over boring the cylinders to 4.125" would make a 117" motor but the reduced cylinder liner spigot thickness is only 30% as rigid as the 114". Not for me - I don't like flexible cylinders, but it has been done by many others. The cylinder spigots are .085" thick at 4.070" bore and fit the case bore that is already the maximum possible diameter of 4.262".

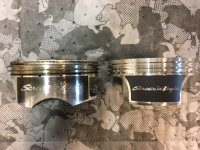
A big improvement in the 114" engine will be an improved Rod Length-to-Stroke ratio and piston skirts without a clearance cut.

pistons 1.jpeg

The 120ST has a 7.575" connecting rod length and 4.625" stroke: Rod/Stroke= 1.637
The 114ST will have a 7.667" connecting rod length and a 4.375" stroke; Rod/Stroke=1.752

A value of 1.75 is considered ideal by many respected car engine builders.

Short ratio (1.637) geometry makes the engine push the pistons harder against the cylinder walls. Combined with the higher piston velocities of the longer stroke and the cut skirt pistons, the pistons and cylinders wear more quickly.

SE pistons 22575-07B are 4.070" diameter @ 10.5:1 compression (with a small dome) allowing the stock 4.06" bore cylinders 16550-04C to be re-bored and honed to fit the new pistons.

pistons 3.jpeg

The engine will be the largest possible bore and stroke for long life in the Harley engine cases, IMHO. Here's what can happen if you bore a 120 out to 124 (4.125 bore with cracked spigot).

Crack.jpg
 
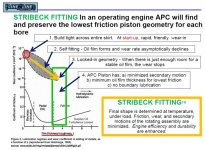
Now for some "weird science". I'm sending my new pistons to Line2Line Coatings for Abradable Powder Coating (APC). This coating will replace the ineffective black factory coating on the pistons that does not do much other than change the color. APC allows for the best possible piston fit in the cylinder, extending engine life and reducing noise and vibration caused by piston slap. Check it out here: Line2Line

Stribeck.jpg

Here's their patent if interested: APC patent
 
How to shorten the stroke from 4 5/8" to 4 3/8"?.....with a Darkhorse Man O’ War 4-3/8" Stroke Signature Series Crankshaft.

logo.png

From Hoban Brothers:
The Man O’War Signature Series crankshaft line by Darkhorse Crankworks provides a 4 3/8” Stroke with 7.667” length FULL-TOP connecting rods for 2007-2016 A-style motors with aftermarket/full top compatible pistons balanced for 1035 gram piston weight.

Heat-treated 4140 flywheel material with integral shafts are harder and 114% stronger than stock. Reduced mainshaft deflection is achieved and verified sprocketshaft & pinionshaft total indicated run-out tolerances of < .0015” at the main bearing races is the tightest in the industry.

The 1.671" diameter crankpin with increased contact area and tighter press fit and the DH proprietary Pro-Plug system & a welded crankpin are coupled together for a stronger joint to STOP scissoring on the crankpin. Integral mainshafts combined with the DH Competition connecting rod kit produces this Rock Solid Foundation for the most powerful of motor builds.

Certified assemblies have met the strictest of tolerances, balanced for 1,035 gram TC Full-top conn-rod compatible pistons & blueprinted by DH craftsmen. Utilizing proprietary methods of consistent balancing and precision machining equates to truer flywheels with less vibration as an assembly. All crankshafts are gear driven camshaft compatible and tolerances are documented so you do not have to (but we still recommend verifying).
 
With the new precision made true running crankshaft from Darkhorse, I can switch over to gear driven cams. No more cam chain tensioner shoes to wear out rubbing on a chain.

I like the SE 259E cam grind that's in the engine now. It just runs great at any RPM in a big motor with increased compression. I found a shop that would custom grind a 259E from high quality Andrews cam shaft blanks that have unfinished lobes: Black Widow Cams They call it the BW SS59E camshaft, available in gear drive only. The cam drive gears come from S&S Cycle.

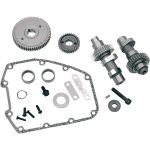
A complete gear driven cam kit, to switch over from chains, looks like this:

E09250157.jpg

It includes new inner cam bearings and plates to cover the hydraulic tensioner ports.
 
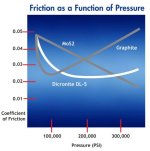
Now for some more "weird science"....I'm dropping off the wrist pins, rocker arms, rocker shafts, cams, and cam gears to be coated with Dicronite. It's a form of Tungensten Disulfide (WS2). It is only .00002" thick and bonds to metal to reduce friction and wear. Tungsten Disulfide (WS2) achieves a dynamic coefficient of .03 and static of .07 to .09. It's sprayed on with dry near to room temperature air. It bonds to metal but does not build up on surfaces because it does not stick to itself. It has an affinity for lubricants, inhancing oil retention on surfaces and helping to enable hydro-dynamic lubrication. Dicronite Link There are other WS2 coating companies that do the something similar.

WS2.jpg
 
I pulled off the primary drive tonight. Get out your BIG wrenches for this. Make note: the clutch hub nut is left hand thread. Put the locking bar in between the sprockets and go for it.

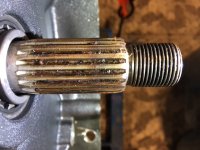
Hmmm...... more stuff I don't like to see. Fretting corrosion on the transmission input spline. The clutch hub female spline fits to this. Hopefully it won't look too bad after I clean it up. A good coating of grease may prevent this from happening again.

Spline.jpeg


Latest posts

Forum statistics

Threads
8,034
Messages
69,478
Members
15,208
Latest member
matta317