120 to 114 to 113 Twin Cam Engine Rebuild
- Thread starter hulkss
- Start date
You are using an out of date browser. It may not display this or other websites correctly.
You should upgrade or use an alternative browser.
You should upgrade or use an alternative browser.
Are you going to make this a winter project, or will you be rebuilding ASAP?
Going at it to get done ASAP. Hopefully next week with luck and available time.
I just replaced the piston jets and inner cam bearings. I will pull the heads apart for new valve seals and a light hand lap next.
Then back together it goes with the new SE-585 chain drive cam, cam plate, oil pump, cylinders, Mahle pistons, and a new tune using one of the last SE Super Tuners and the new SE wide band tuning module.
Hulkss,
Did you check your cylinder bores for roundness? When rebuilding the older Evos and Shovels it was common to find the occasional egg shaped bore with strange scuff marks in which case we would bore the cylinder instead of hone on the rebuild. I am not familiar with the rigidity of the TC cylinders and maybe this is not an issue.
Did you check your cylinder bores for roundness? When rebuilding the older Evos and Shovels it was common to find the occasional egg shaped bore with strange scuff marks in which case we would bore the cylinder instead of hone on the rebuild. I am not familiar with the rigidity of the TC cylinders and maybe this is not an issue.
Hulkss,
Did you check your cylinder bores for roundness? When rebuilding the older Evos and Shovels it was common to find the occasional egg shaped bore with strange scuff marks in which case we would bore the cylinder instead of hone on the rebuild. I am not familiar with the rigidity of the TC cylinders and maybe this is not an issue.
I had the original 4.060" bore cylinders professionally bored and honed with torque plates by Dave Mackie Engineering to 4.070".
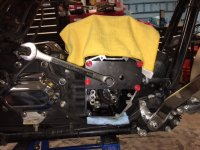
Here's some pic's of the cam chest going together. After you torque the cam plate into the engine, be sure to snug two oil pump screws just enough to hold position and then rotate the engine so the pump can find its center. Then torque all four pump screws.
Pressing in new inner cam bearings:
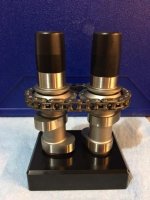
The new SE-585 cams and inner chain:
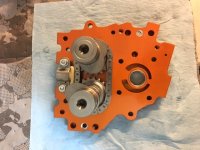
Cams in new SE cam plate:
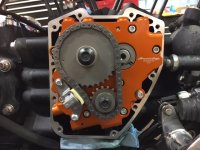
Ready to close it up.
Pressing in new inner cam bearings:

The new SE-585 cams and inner chain:

Cams in new SE cam plate:

Ready to close it up.

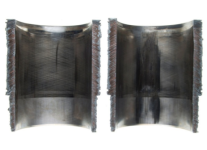
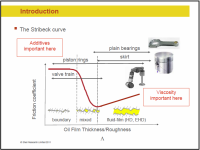
All of my engine problems have involved piston scuffing. It seems that the lubricant property that best helps prevent piston scuffing is called High-Temperature/High-Shear Viscosity or HTHS. HTHS viscosity is the way to measure the ability of fully warmed (150°C/302°F) oil to flow within the contact between fast moving engine parts. HTHS occurs in contact areas such as the piston skirt & ring-to-liner interface. Too low of HTHS viscosity can lead to an increase in wear resulting in cylinder liner scuffing.
Having enough HTHS viscosity is important for acceptable wear life in a hot high powered air cooled engine.
The oil I was last using, Race Tech 10W-60, states they exceed an HTHS value of 3.5. Best I can tell, the manufacturer of this oil is keeping the HTHS low to improve fuel economy as they state it is an energy-conserving motor oil. Low HTHS viscosity has been proven to improve fuel economy.
I'm switching to the new Amsoil 15W-60 V-Twin that has an HTHS viscosity of 6.9, almost double.
Here are test results of HTHS on some other motorcycle oils:


Having enough HTHS viscosity is important for acceptable wear life in a hot high powered air cooled engine.

The oil I was last using, Race Tech 10W-60, states they exceed an HTHS value of 3.5. Best I can tell, the manufacturer of this oil is keeping the HTHS low to improve fuel economy as they state it is an energy-conserving motor oil. Low HTHS viscosity has been proven to improve fuel economy.
I'm switching to the new Amsoil 15W-60 V-Twin that has an HTHS viscosity of 6.9, almost double.
Here are test results of HTHS on some other motorcycle oils:

Thank you for posting the HTHS oil chart!
Amsiol and M1, Two of the most popular oils, have excellent HTHS values as one would expect. The HD oil offerings are not bad either.
I have read that a good portion of engine wear occurs at startup. One might deduce that a quality synthetic oil with with appropriate additives in appropriate amounts would work to eliviate some of that startup wear.
Last edited:
Thank you for posting the HTHS oil chart!
Amsiol and M1, Two of the most popular oils, have excellent HTHS values as one would expect. The HD oil offerings are not bad either.
I have read that a good portion of engine wear occurs at startup. One might deduce that a quality synthetic oil with with appropriate additives in appropriate amounts would work to eliviate some of that startup wear.
Yes, the start-up wear issue is helped mainly by anti-wear additives that cling or bond to metal surfaces when the engine is shut down and are there for the next start.
I do believe higher HTHS will help prevent piston scuffing in modified high power air cooled H-D engines that are operated at wide open throttle.
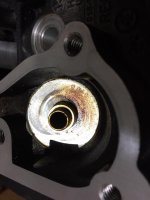
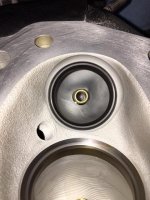
I pulled the heads apart and found a few issues. The exhaust valves were running hot and the exhaust valve seals were kinda "crispy" instead of rubbery. Here you can see the varnish from heat on the aluminum under the spring seat and the top of the valve guide that was under the seal.
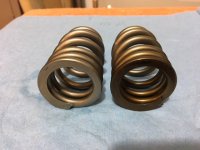
The exhaust valve spring is discolored as compared to the inlet spring on the rear head. The exhaust valve stems were coked with carbon almost to the point of sticking in the guides.
I guess running at WOT for significant periods on mountain grades was not a good idea. I've backed off on compression on the new build and will run more spark advance along with a richer air/fuel mixture. This will lower exhaust gas temperatures.
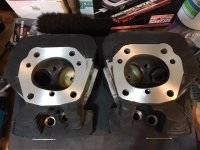
Here's the heads after sanding the faces clean and flat with 320 grit paper taped to a granite surface plate.
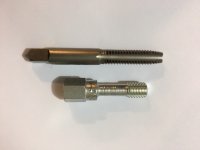
Here's a thread chaser VS a thread tap. The chaser cleans threads and reforms them without removing metal like a tap. Maybe use a tap once then a chaser for subsequent builds when you clean threads.

The exhaust valve spring is discolored as compared to the inlet spring on the rear head. The exhaust valve stems were coked with carbon almost to the point of sticking in the guides.

I guess running at WOT for significant periods on mountain grades was not a good idea. I've backed off on compression on the new build and will run more spark advance along with a richer air/fuel mixture. This will lower exhaust gas temperatures.
Here's the heads after sanding the faces clean and flat with 320 grit paper taped to a granite surface plate.

Here's a thread chaser VS a thread tap. The chaser cleans threads and reforms them without removing metal like a tap. Maybe use a tap once then a chaser for subsequent builds when you clean threads.

Now to clean the combustion chambers and valves. I found a great way to do this with a soda blaster from Harbor Freight. p/n 60801
Just add an air compressor and a bag of baking soda media.
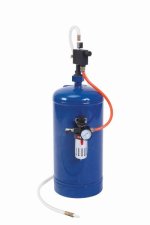
Soda blasting is safe for the parts and does not erode the aluminum. Then clean off any residual soda in a laundry tub as it dissolves in water quickly and easily.
Check out these heads now! Cleaner than my kitchen pots and pans.
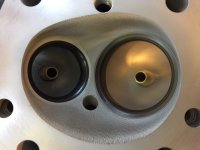
Here's a look after I hand lapped the valve seats.
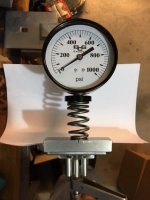
I checked the valve springs out in a bench vice with this little gauge from Comp Cams.
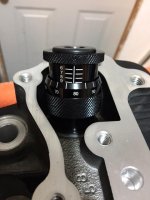
Then I checked the installed spring heights with this trick cylindrical micrometer from Comp Cams. You put all the valve parts together with the gauge substituted for a spring. Then just twist it until tight to measure. I found that some shims were needed (.030" to .045") under the spring seats to get the spring force where I wanted it. Be sure to keep springs .060" away from coil bind at maximum cam lift.
Just add an air compressor and a bag of baking soda media.

Soda blasting is safe for the parts and does not erode the aluminum. Then clean off any residual soda in a laundry tub as it dissolves in water quickly and easily.
Check out these heads now! Cleaner than my kitchen pots and pans.

Here's a look after I hand lapped the valve seats.

I checked the valve springs out in a bench vice with this little gauge from Comp Cams.

Then I checked the installed spring heights with this trick cylindrical micrometer from Comp Cams. You put all the valve parts together with the gauge substituted for a spring. Then just twist it until tight to measure. I found that some shims were needed (.030" to .045") under the spring seats to get the spring force where I wanted it. Be sure to keep springs .060" away from coil bind at maximum cam lift.

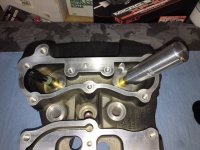
I installed new viton rubber spring energized valve seals from AV&V. They push on with the aluminum tool on the right. On the left I put the tip of a disposable rubber glove finger over the valve stem with a little oil on it. This protects the seal as it slides over the keeper groove in the valve stem before you push it on with the tool.
Time to put the springs back in. I used a little spring compressor from Goodson that bolts right to the head.
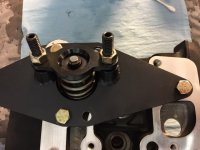
I pressed in new exhaust seals with a tool from Jims.
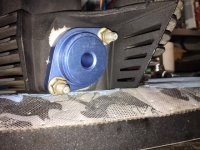
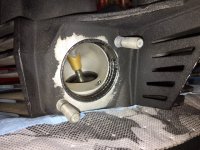
Piston and cylinder assembly is next now that the heads are ready to go on.

Time to put the springs back in. I used a little spring compressor from Goodson that bolts right to the head.

I pressed in new exhaust seals with a tool from Jims.


Piston and cylinder assembly is next now that the heads are ready to go on.
I had to change my installation method for the piston circlips.
The Mahle ones are super heavy-duty and the piston did not have the little notch for a screw driver to pry in. There was a slot at the bottom that went all the way through.
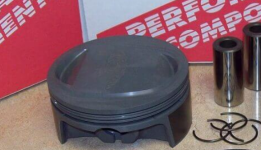
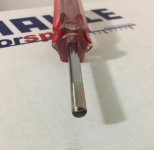
I made this tool from a cheap screwdriver. I rounded the edge at the end and filed in a 90 degree notch. This worked perfectly and I could push the clips in without any problems.
The cylinders went on as before.
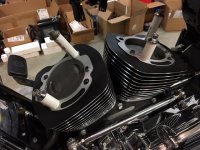
The pistons were .003 below deck height as assembled without full head bolt preload on the cylinders, so I went with the .040 H-D Multi-Layer Steel (MLS) head gasket.
I switched to what I believe is the best head bolt torque procedure for use with MLS gaskets. I used what is in the H-D manual: 10 ft-lbs, 16 ft-lbs, and then a 90 degree turn. Now the new part not in the manual: loosen the head bolts and repeat the procedure. I had marked the head bolts to reference the 90 degree turn and the second time the bolts were turned significantly further when finished. You have to let those embossed steel gaskets relax once after the first squish or they will relax over time and you will loose preload. The manual was written for stock non-metallic gaskets. My wrench was set at 42 ft-lbs and it just barely clicked on about half of the fasteners.
The Mahle ones are super heavy-duty and the piston did not have the little notch for a screw driver to pry in. There was a slot at the bottom that went all the way through.

I made this tool from a cheap screwdriver. I rounded the edge at the end and filed in a 90 degree notch. This worked perfectly and I could push the clips in without any problems.

The cylinders went on as before.

The pistons were .003 below deck height as assembled without full head bolt preload on the cylinders, so I went with the .040 H-D Multi-Layer Steel (MLS) head gasket.
I switched to what I believe is the best head bolt torque procedure for use with MLS gaskets. I used what is in the H-D manual: 10 ft-lbs, 16 ft-lbs, and then a 90 degree turn. Now the new part not in the manual: loosen the head bolts and repeat the procedure. I had marked the head bolts to reference the 90 degree turn and the second time the bolts were turned significantly further when finished. You have to let those embossed steel gaskets relax once after the first squish or they will relax over time and you will loose preload. The manual was written for stock non-metallic gaskets. My wrench was set at 42 ft-lbs and it just barely clicked on about half of the fasteners.
hulkss ,if the head bolts are torque to yield they should not be retorqed or reused. the bolts stretch as you turn to 90 degrees. just food for thought. I do enjoy reading your progress.
Hulkss,
Nice to see all the tricks of the trade and specialty tools for the job along with the explanation....thank you....
BTW.... I would EAT off those heads.... VERY clean and I can see the difference on the seats in the BEFORE and AFTER of the lapping.... how were the valves themselves? Anything noticeable?
hulkss ,if the head bolts are torque to yield they should not be retorqed or reused. the bolts stretch as you turn to 90 degrees. just food for thought. I do enjoy reading your progress.
The head bolts are not torque to yield. There are long ultra-high strength skinny steel studs that go the full length of the cylinder and the head bolts you see are actually long hollow nuts. The last 90 degree turn of the bolt stretches the studs (not the bolts) without yielding, to a specific preload. They stretch even further when the engine is hot (steel studs aluminum cylinder).
Early versions of aftermarket all aluminum nikasil cylinders grew in height so much that the studs pulled out of the cases on occasion.
Hulkss, Nice to see all the tricks of the trade and specialty tools for the job along with the explanation....thank you....
BTW.... I would EAT off those heads.... VERY clean and I can see the difference on the seats in the BEFORE and AFTER of the lapping.... how were the valves themselves? Anything noticeable?
The valves are still the original 120ST valves. Other than the carbon, they looked good. Maybe a little of the thin chrome on the stems rubbing off. The new manganese-bronze guides don't need the chrome like the OEM cast iron guides.
The hand lapping was super easy using 600 grit silicon-carbide lapping compound from Goodson. Take off the valve seals and oil the stems first.
Good video of hand lapping:
I cranked the engine over using my remote starter switch tonight. Same method as I posted previously in this thread. The oil pump primed up to 30 psi on my mechanical gauge installed where the pressure sensor goes. I did NOT put the breathers in upside down this time  I'm routing a breather line out the back of the bike with no catch can.
Next up is installing the new H-D Smart Tune Pro Automatic Tuning Module.
Next up is installing the new H-D Smart Tune Pro Automatic Tuning Module.
