2015 SGS motor mods
- Thread starter NGOT8R
- Start date
You are using an out of date browser. It may not display this or other websites correctly.
You should upgrade or use an alternative browser.
You should upgrade or use an alternative browser.

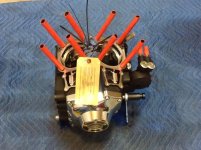
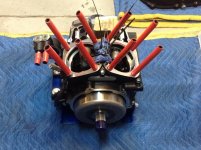
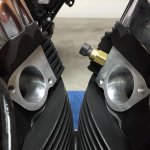
It's really nice to be able to see the workmanship and components that are going into my bottom end. Here are the last few pics. I will continue to add more as the build progresses.
Attachments
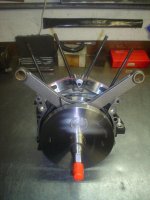
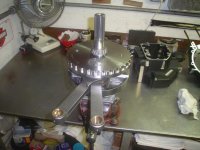
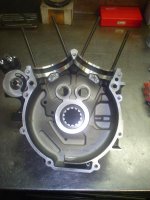

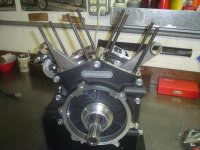
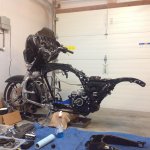
Removed the rear fender, wheel and swingarm in preparation for shipping the arm out to get modified. Could have used an extra set of hands to get the arm off, but no one was available, so I had to improvise a bit. The bottom end also arrived today. I'll start working on the upper end tomorrow.
Attachments
My wife and I installed the pistons in the jugs this afternoon. I'm very grateful that she offered to help, as I definitely needed a second pair of hands for this task. She didn't even complain once about getting her hands oily either.
Attachments
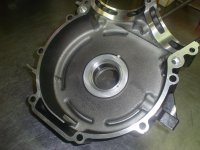
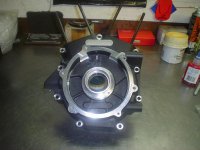
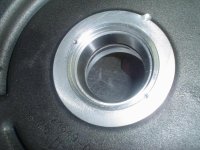
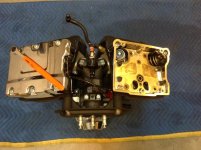
Thanks TomA. The excitement is definitely building! This is my second motor build ever (first was an 08 GSXR-1000), so I prefer to move slow to avoid any mistakes. I will say that the HD motor is an easier build by far. One thing I've found out, is that there are lots of seals on this motor/tranny. Before the build I developed a leak which I suspected was coming from the inner primary, but I wasn't 100% sure that was the source of the leak. However, I decided to replace all of the seals, inner primary bearing and inner primary main shaft bearing race in hopes of finding the culprit. More pics coming soon.
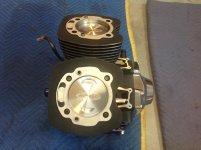
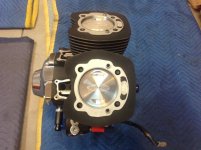
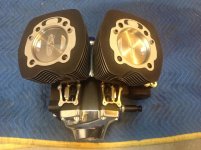
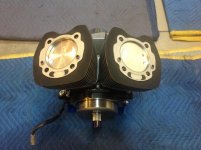
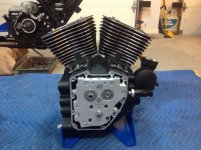
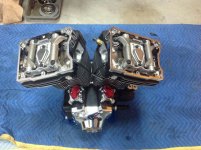
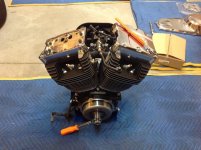
Got the heads, rocker boxes, rocker arm assembly and Rocker Lockers installed this evening. Getting close to wrapping things up. All that's left to do is, install the throttle body, new front cam c-clip, rear cam sprocket, crank sprocket and pushrods.
Attachments
Last edited:
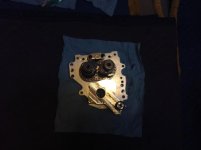
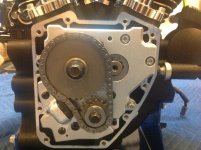
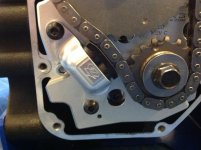
Finished up in the cam chest tonight. Part of the reason for the delay was, I had to get a new circlip from the dealer for the front camshaft. Didn't want to reuse the original one, as I was afraid it was sprung and may have come off during operation. Here,are a couple of shots of the new dual piston front hydraulic cam chain tensioner installed.
Attachments
Last edited:
Thanks danoday! My wife is actually very supportive of my hobbies and understands that this type of work is very therapeutic to me. She only fusses (a little), about me turning certain areas of our house into parts lockers while I work on things. I hope to have the motor finished in the next couple of days. She is very excited and ready to go for a ride. She's been hinting that I need to get a tour pack with "the captain's chair" on it, LOL! More pics coming soon.
A captains chair sounds like a very reasonable request.Thanks danoday! My wife is actually very supportive of my hobbies and understands that this type of work is very therapeutic to me. She only fusses (a little), about me turning certain areas of our house into parts lockers while I work on things. I hope to have the motor finished in the next couple of days. She is very excited and ready to go for a ride. She's been hinting that I need to get a tour pack with "the captain's chair" on it, LOL! More pics coming soon.
Sent from my SAMSUNG-SM-N910A using Tapatalk
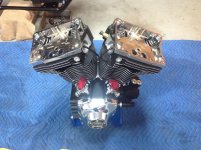
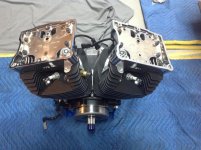
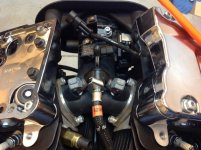
Well, I was rockin' and rollin' on the motor today and then it happened. I got a little impatient when installing the pushrod tube retaining clips. I attempted to use a screwdriver when I should have bought the tool that allows for installation without damaging the finish. Needless to say, I will be ordering a new pushrod tube assembly (only need one). As upset as I was about the mishap, I looked at the bright side of things which was; that gave me the opportunity to remove the rocker arm assemblies and take the pushrods out through the top. I even measured them while I had them out and they're all spot on. I will say this, if I ever rebuild in the future, I will get the easy fit pushrods. While I like the Fuel Moto pushrods that I'm using (they're very well made), they were a little bit of a challenge to work with (especially the pushrod tube holding tool that comes with them). I also installed the throttle body (mocked up the SE 58mm backing plate to help with alignment). Those were my goals for today and although I didn't exactly accomplish all of them, the day was still very productive. Here are a few pics (including the marred pushrod tube top). SMH
Attachments
Last edited:
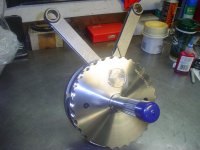
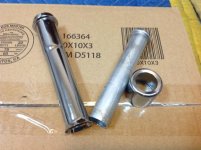
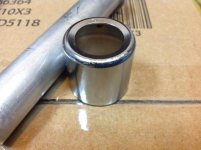
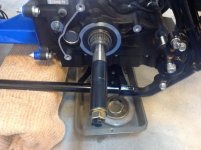
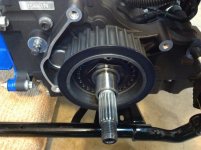
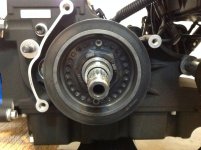
New shifter shaft seal installed, along with new main shaft bearing race and the Andrews 30T pulley with a Jim's sprocket nut. The sprocket holding tool and main shaft bearing race driver were worth their weight in gold for these jobs.
Attachments
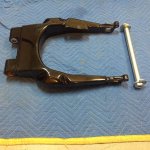
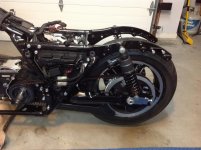
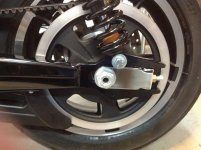
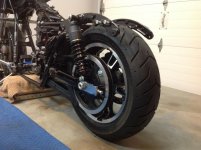
No motor pics today (still waiting on that dang pushrod tube from HD). However, I did get my modified swingarm back. I now have 2" of adjustability which will give me plenty of room to make changes to the gearing if needed. The new adjusters are very similar to what you would see on a sport bike extended swingarm.
Attachments
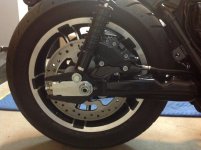
No motor pics today (still waiting on that dang pushrod tube from HD). However, I did get my modified swingarm back. I now have 2" of adjustability which will give me plenty of room to make changes to the gearing if needed. The new adjusters are very similar to what you would see on a sport bike extended swingarm.
NGOT8R,
What does a modified or extended swing arm do over a stock swing arm? thanks.
NGOT8R,
What does a modified or extended swing arm do over a stock swing arm? thanks.
Generally speaking, an extended swingarm will help keep the front wheel on the ground which allows for better power delivery. However, in my case I wanted it because I have changed the gearing on my bike from 32/68 to 30/68 and needed the adjustability. I could have gone with a shorter belt, but my research indicates that the aftermarket short belts were breaking with little to no miles or abuse. The stock belt is said to be the strongest on the market. Having said that, I had to find a way to keep the stock belt and the swingarm modification was the answer for me.