2015 SGS motor mods
- Thread starter NGOT8R
- Start date
You are using an out of date browser. It may not display this or other websites correctly.
You should upgrade or use an alternative browser.
You should upgrade or use an alternative browser.
Thanks, I knew that was a common mod for metric bikes, but I didn't consider the belt adjustment for gearing, that's good stuff, was that a bolt on modification?
Sent from my SAMSUNG-SM-N910A using Tapatalk
Thanks. Unfortunately it wasn't a bolt on mod. I had to send it out to have the stock adjuster blocks cut off, the adjuster cams on the rear axle had to be turned down in a mill and new adjuster blocks welded on. The whole arm was also sanded and powder coated gloss black again.
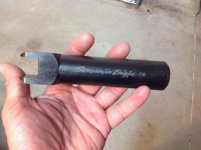
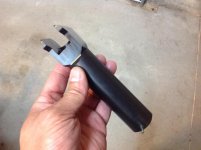
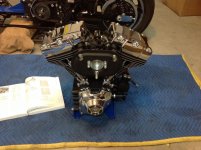
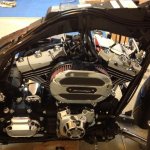
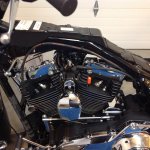
It's finally done! I got the push rod tube and SE installation tool from HD yesterday. I woke up bright and early this morning and finished up. Note: For those that have and/or will struggle with installing push rod tube retainer clips, get the SE installation tool. It makes short work of this job and it does it without causing any damage to chrome parts. I think it's constructed out of delrin plastic. I hope to have the motor back in the frame in the next couple of days. I just have to make arrangements with my human cranes first; to have them do the lifting. LOL
Attachments
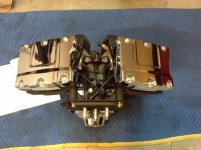
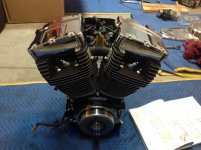
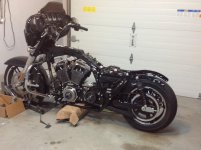
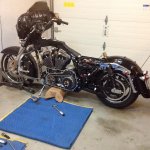
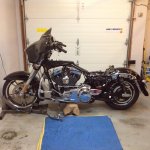
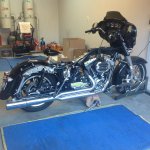
My two buddies and I performed the transplant today and let me say; what a PITA it was (and that's being real nice about it). It took all three of us to pull it off. Now let me talk about lessons learned for a second, in hopes of helping someone else that may decide to go down this road. First off, the motor will fight you until the bitter end if you try and install it from the left side. It HAS to be installed from the right side. It's a very tight fit and requires manipulation of the motor (leaning the top end out away from the frame while inserting the bottom end in first). You'll need to use a floor jack underneath the transmission to pivot the tranny up or down and line up the dowel pins, so that the motor will mate to the tranny. DONT remove the floor jack until you install the four rear bolts through the tranny and into the engine. Note: Be very careful not to damage the rear brake line and brake sensor. While my brake line wasn't damaged, my rear brake sensor wiring did get snagged, which resulted in one of the male spade terminals being broken off of the sensor. That means I'll need a new switch from the dealership and have to bleed the rear brakes down. For those who'd like to know, the motor weighs somewhere in the neighborhood of 160-175 pounds. Lastly, install a new tranny to engine interface gasket, because if you reuse the old one and it leaks, it'll suck to have to remove everything again to change it. I was fortunate in that the dealership was open today and they had several in stock. I think that about covers things for the transplant.
Attachments
Last edited:
Looks good almost there are you getting nervous about getting to ride now??
Not so much nervous about getting to ride, but definitely a little nervous about hitting the starter button for the first time. The only cure for that nervousness is going to be, seeing and hearing the motor come to life.
I'm shutting it down for the night. Gonna try and resume work after I get some sleep. I do have a question though. For those running the larger spark plug wires, is the wire chaffing exacerbated with the use of larger wires? I'm planning on putting a piece of rubber underneath the left side of the tank to see if that will prevent chaffing. Has anyone tried that?
Attachments

Looks like your getting close a little light at the end of the tunnel.
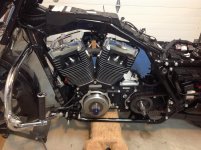
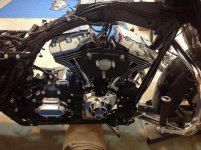
Yep, and there's even more light at the end of the tunnel now! I installed the Pro Pipe yesterday. All I have left to do now is, replace the rear brake light switch that got damaged when installing the motor, bleed the rear brakes, install the plasma rods, Thundermax, tank, bags and side panels, fill it with fluids and press the starter button.
Attachments
Last edited:
Woohoo! I hit the starter button this evening and the motor came to life. What a great feeling it was after a lot of hard work. I only let it run for 47 seconds because I didn't have time to heat cycle it yet and won't be riding it until I do. You can hear my wife at the end of the video asking if it's supposed to sound like that (referring to the loping sound). Here's a short clip.
https://m.youtube.com/watch?feature=youtu.be&v=TjLP50pM65A
https://m.youtube.com/watch?feature=youtu.be&v=TjLP50pM65A
Last edited:
You can hear my wife at the end of the video asking if it's supposed to sound like that (referring to the loping sound). Here's a short clip.
https://m.youtube.com/watch?feature=youtu.be&v=TjLP50pM65A
Couldn't see video, is private. 8(
Couldn't see video, is private. 8(
Try it again Skeeter. You should be able to view it now.
Try it again Skeeter. You should be able to view it now.
Super! Nothing like the excitement of firing it up after the build!
It sounds sweet . . . !!!
Here's a better video clip of the motor idling during one of the heat cycles.
https://youtu.be/xmVz8K52_7U
https://youtu.be/xmVz8K52_7U
Last edited:
